Phoenix Ignited is a proud tech solutions partner of Luxauro.com. View their news and media page here: Luxauro.com
This tutorial walks you through setting up Keycloak as an IAM for one or more WordPress sites.
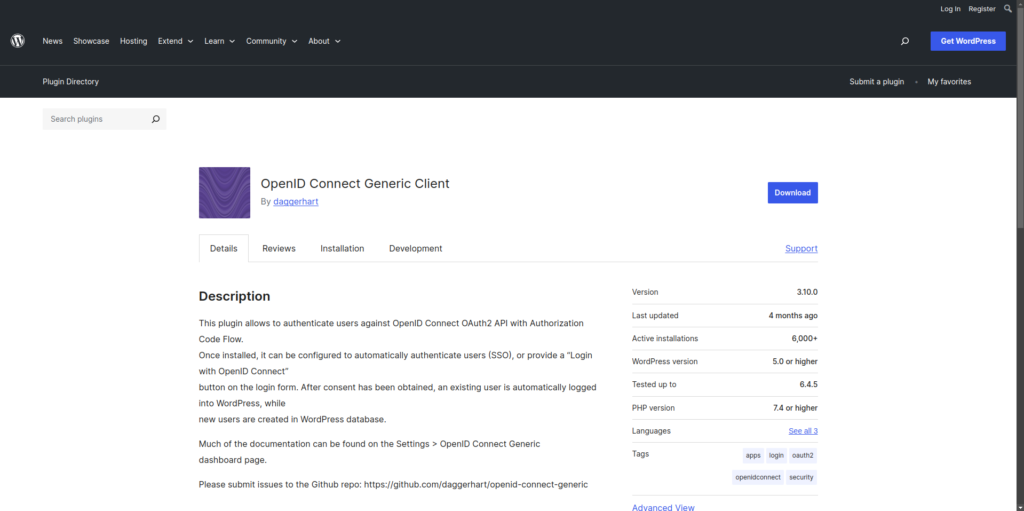
Our first step is to install the OpenID Connect plugin by Daggerhart on our WordPress site(s). You can find the plugin in the WordPress repository here: https://wordpress.org/plugins/daggerhart-openid-connect-generic/, just download the plugin and upload it to your WordPress site as you would any other WordPress plugin or of course you can install from your WordPress dashboard -> Plugins -> New Plugin.
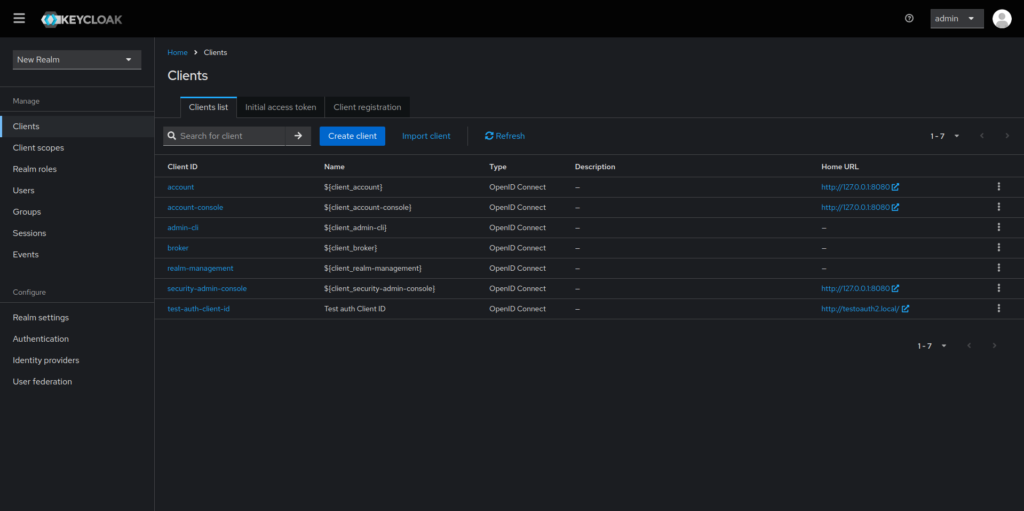
Next we will go to our Keycloak dashboard and create a new client. Go to Clients -> New Client.
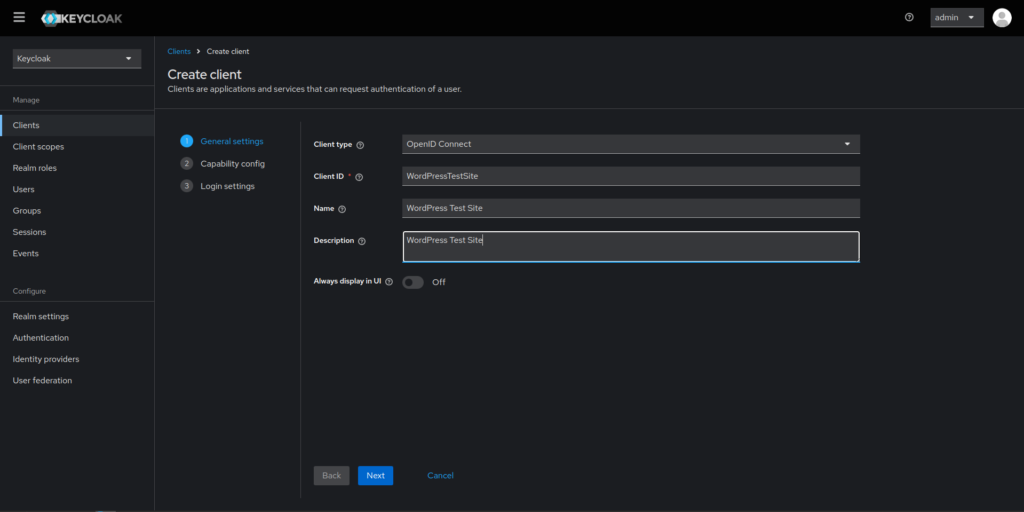
Now in the General Settings tab give the new client a Client ID, you can also add a name and a description. Once you are done press “Next”.
Now go back to your WordPress Dashboard and go to Settings -> OpenID Connect. You should see:
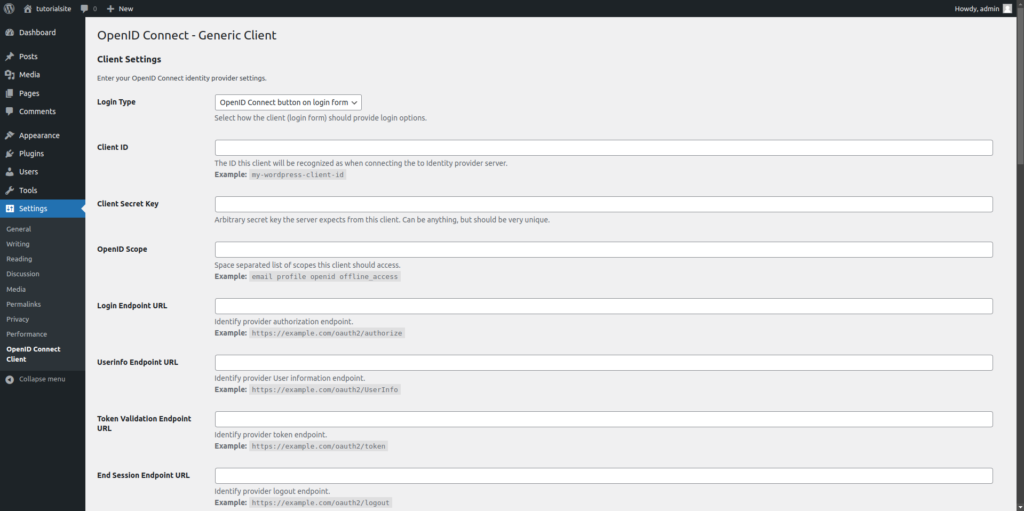
Set the Client ID in the WordPress OpenID Connect settings to the exact value you gave it in the Keycloak -> General Settings tab. Now go back to your Keycloak Dashboard, we left off in the Capability Config tab.
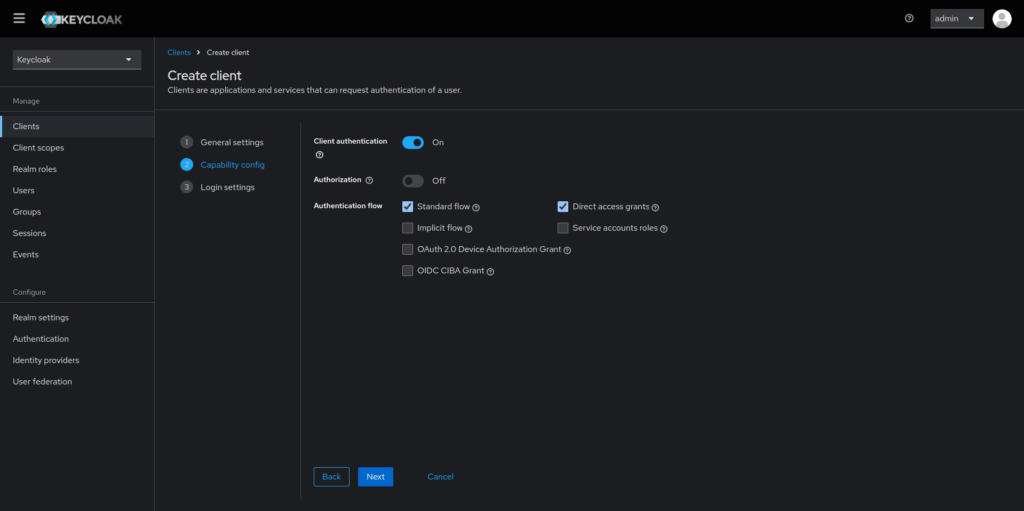
Most of these settings we will leave alone here, however I always switch the Client Authentication to “On”. Then press “Next”.

Here you will see various fields including “Root URL”, “Home URL”, Etc. The Root URL and Home URL will normally be set to your website’s domain name such as https://example.com. For most setups the post logout redirect URLs field will just be the domain name with a /* appended for instance https://example.com/*. The “Valid Redirect URLs” field is a little more interesting though. Go back to the OpenID Connect Dashboard on your WordPress site and scroll to the bottom, you should see something similar to the following:

Here it lists the Redirect URL, copy this and paste it back in the “Valid Redirect URL” field of your new client in Keycloak. Press “Save”. Now go to your Keycloak Realm’s settings and scroll to the bottom where it says “OpenID Endpoint Configuration”
Follow the link and you will see something like:

Specifically look for where it reads “authorization_endpoint”, “token_endpoint”, “logout_endpoint” and “userinfo_endpoint”. Now go back to the OpenID Connect Settings Dashboard in WordPress. Note the fields that read “Login Endpoint URL”, “Token Validation Endpoint URL”, “Logout Endpoint URL”, and “Userinfo Endpoint URL”, and input the corresponding values as seen in the OpenID Endpoint Configuration file we just saw.

Now in the “OpenID Scope” field in the OpenID Connect Settings Dashboard just enter:
openid email profile
Finally all we have left is the Client Secret Key, go back to your keycloak Dashboard, go to your Client’s settings and go to the Credentials tab. Copy the Client Secret Key and paste it back in the “Client Secret Key” field in the OpenID Connect settings dashboard in WordPress.

Now before we can test this out we need to create a keycloak user (although you could register one on login if you wanted), be sure the user has a username, email, and password, then open a private window and navigate to your WordPress site’s wp-admin and login using the “Login with OpenID Connect” button. You should be prompted to log into Keycloak, once you login it should auto direct you back to your WordPress site and you should be logged in!
Walter Miely is a tech entrepreneur and CEO of Phoenix Ignited Tech You can find him on Linkedin. This material is licensed under the CC BY 4.0 License LEGAL DISCLAIMER: The content provided here is provided AS IS, and part of, or the entirety of this content may be incorrect. Please read the entireLegal Disclaimer here.
+ Ave Maria +