Phoenix Ignited is a proud tech solutions partner of Luxauro.com. View their news and media page here: Luxauro.com
WordFence is a long-standing and powerful WordPress security plugin / solution. Protecting over 5 million sites, WordFence’s web-app firewall includes 467 firewall rules and it’s scanner includes 4,929 malware signatures. WordFence also offers 2FA for your WordPress site, numerous security settings, logging capabilities, and brute-force protection. The free version is an essential in WordPress security.
Via the WordPress Plugin directory: Search for “WordFence” click install and activate.
Via manual upload: Go to Wordfence.com download the plugin then go to your WordPress admin dashboard > go to plugins > add new > upload, and upload the zip file you just downloaded, install it and activate it.
After you activate WordFence you will need to install a WordFence license, the Free License will work, but you can get a paid license for immediate protection from new threats, and support for if your site get’s hacked etc.
Once you install WordFence we will configure the WordFence firewall. Go to the WordFence dashboard and select manage firewall.
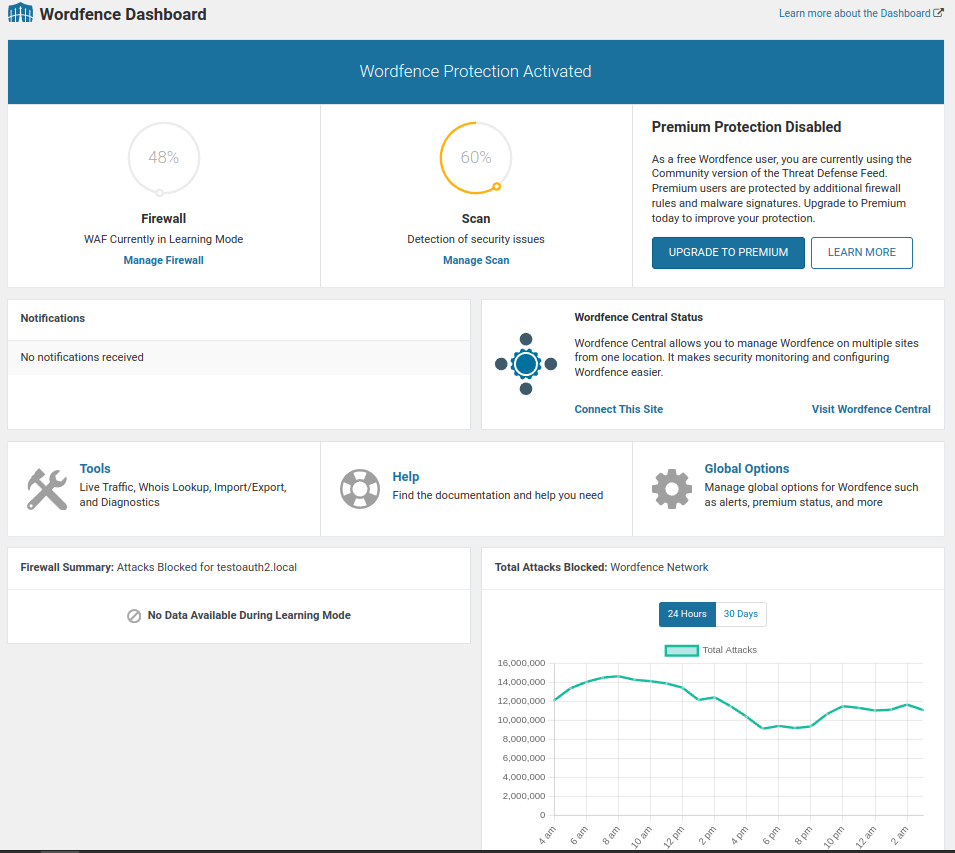
Once in the WordFence Firewall dashboard we will set the WordFence Firewall to active and protecting. By default it is set to Learning Mode, this is usually unnecessary for most use cases and should be changed to actually activate the firewall. Learning Mode sets the firewall to a sort of stand-by mode and adds allow-listed URLs etc. to the firewall configuration to prevent conflicts with themes and plugins. From my experience conflicts do happen, but on a basic wordpress setup are very rare, and as leaving the firewall in Learning Mode could potentially allow threats to be allowed and white-listed, I immediately activate the firewall. Once you set the firewall to active and protecting be sure to save your changes in the right hand corner of the screen.
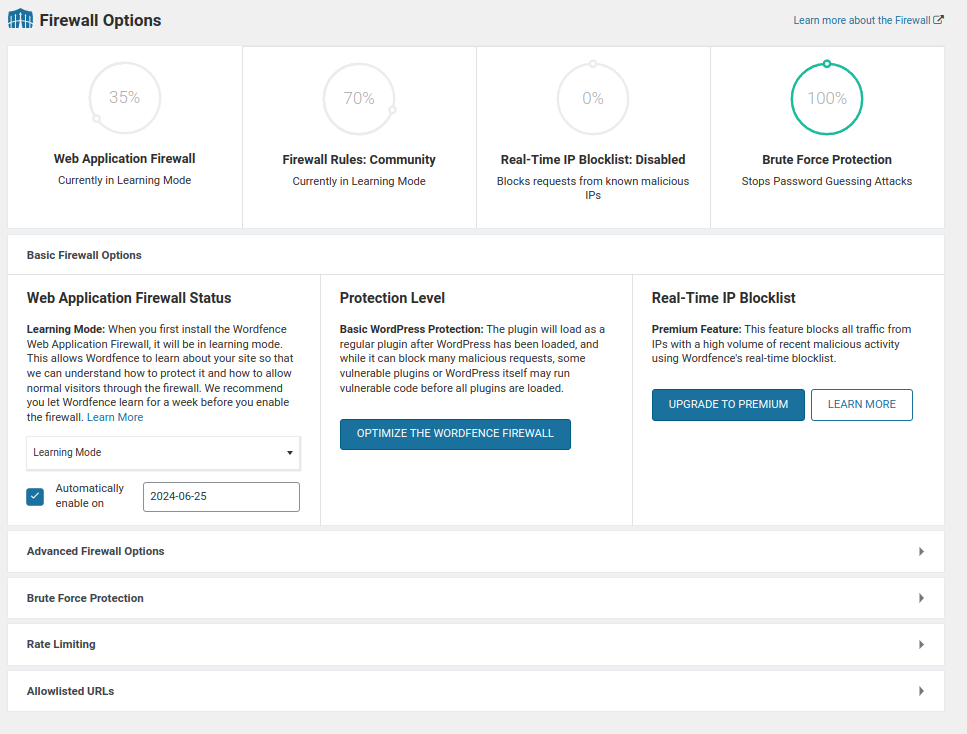
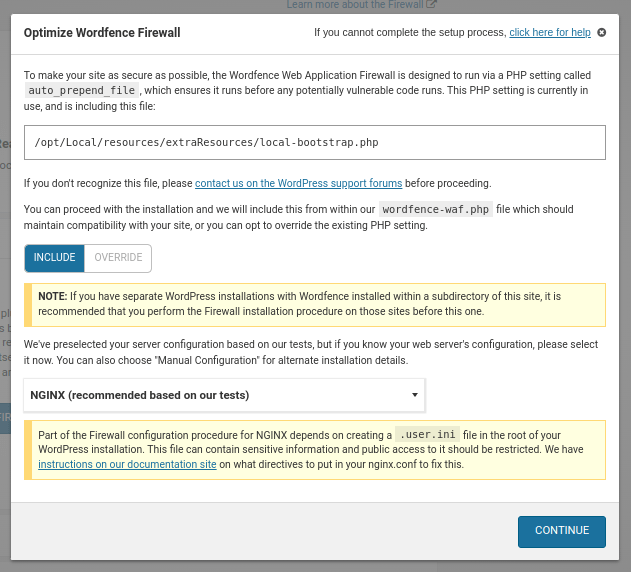
Once you have set the firewall to active and protecting, you will want to enable enhanced firewall protection, select the “Optimize the WordFence Firewall’ button, you will see a warning regarding backing-up your .htaccess file, just download the backup and proceed (it is quite rare that optimizing the firewall will crash your site).
Once we have optimized the firewall we will proceed to configure any advanced firewall settings. Open the advanced settings drop-down.
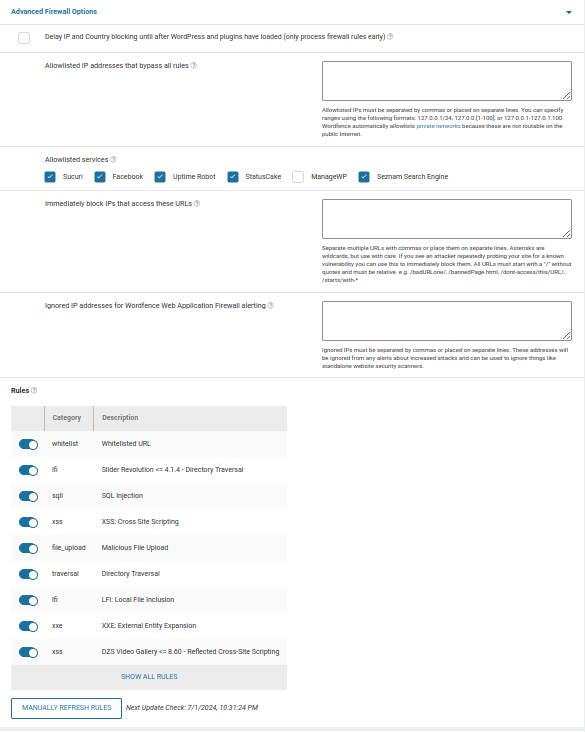
Here you can set several settings related to the firewall configuration such as:
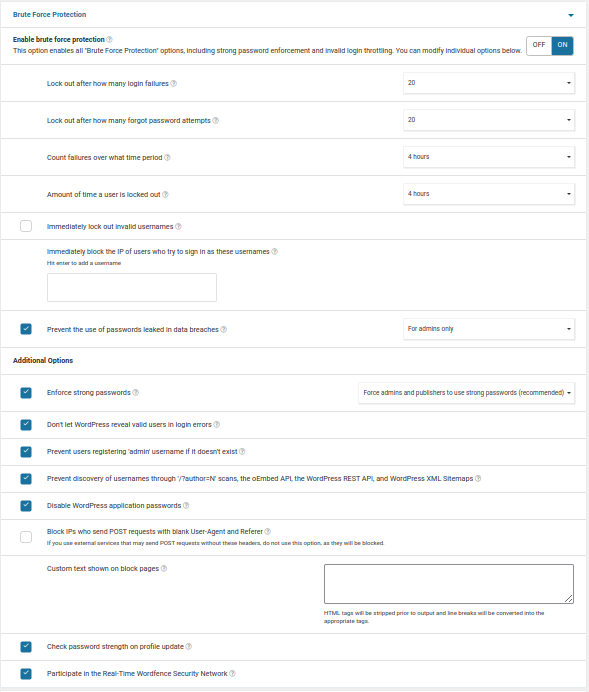
In the Brute Force Protection drop-down you can set multiple settings to protect against brute-force attacks including how many login attempts before an IP is blocked and for how long the IP is blocked, etc.
In the rate limiting drop-down you can set the maximum number of requests that bots and humans can make to your site over a defined amount of time before being limited (blocked).

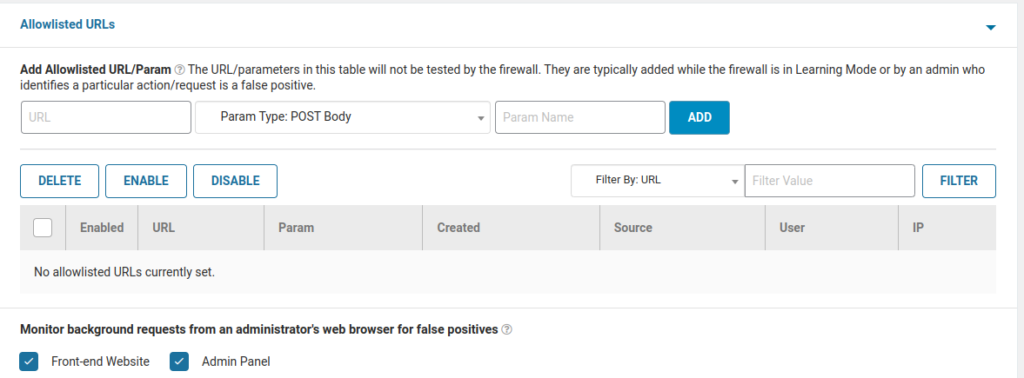
In this section you can allowlist urls and their params. This is helpful in multi-user setups where certain urls / url-endpoints may trigger the wordfence firewall to block legit requests for non-admin users. I’ve seen this especially in scenarios where a plugin allows a user to upload .csv’s and other executable file types. Allowlisting URLs is rather complex and I intend to make a separate tutorial on it in the future, the best way to debug those issues is to temporarily put the firewall in Learning Mode, go do the action that the firewall was blocking and then re-enable the firewall, you will see that the firewall has automatically added those urls / url-endpoints to the allowlisted urls section here.
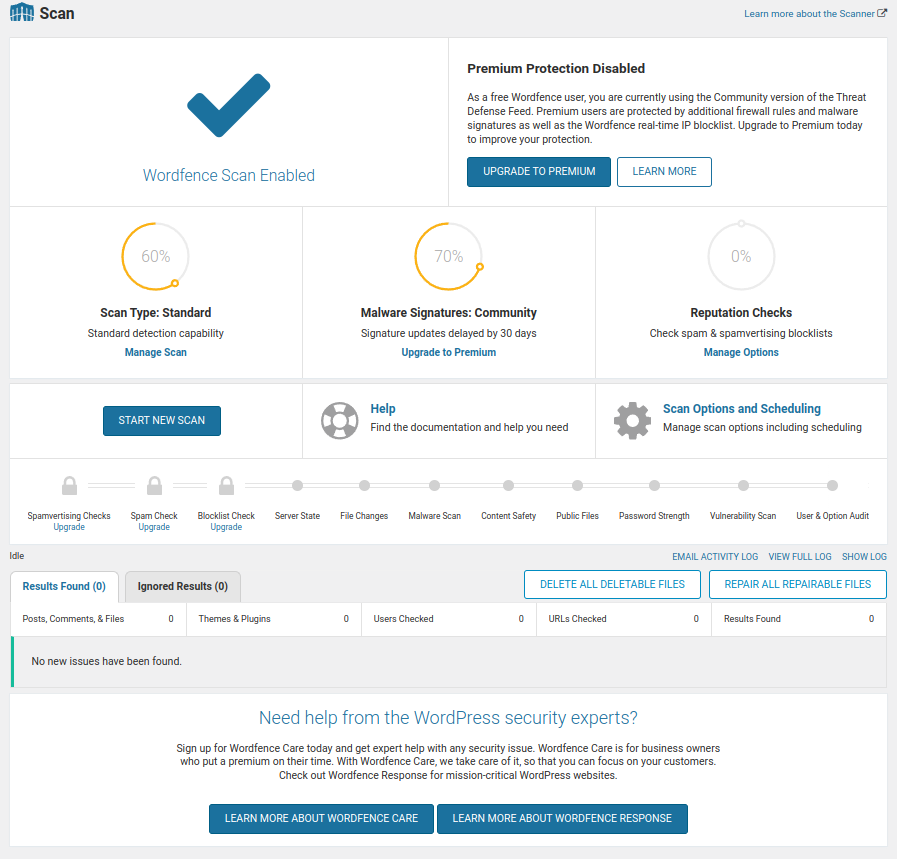
Next we will configure the scanner settings and schedule a run a first a scan on our site. Go to WordFence > Scan, once you are at the scan dashboard click “Manage Scan” or “Scan Options & Scheduling”.
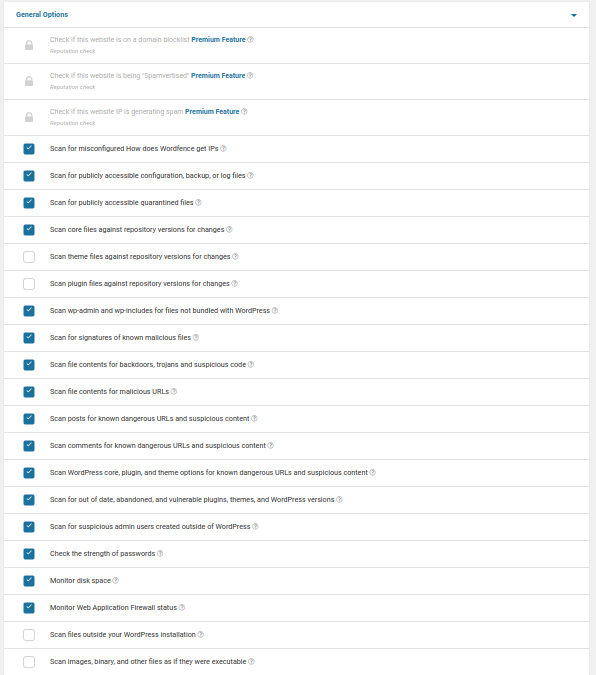
Now that you are at the Manage Scan dashboard we can go through the basic scanner settings.

From the scan dashboard you can see the Scan Type, the Malware Signatures Type, and your site’s Reputation. With the Free License you get the community malware signatures version and no reputation checks. For our purposes it is good enough.
In the Basic Scan Type Options drop-down we can change the scan type that we will run according to our scan schedule, you can change this between Limited, Standard, High, and Custom. The dashboard explains fairly well what each scan does, I recommend leaving it at Standard, unless you think you may have been hacked.
If you go to the Scan Scheduling drop-down you can select whether or not to run scheduled scans, in the Free Version, WordFence schedules the scans, but if you upgrade you can schedule the scans yourself.

In the General Options drop-down we can adjust various scan settings such as scanning file contents for malicious URLs, checking password strength etc. Feel free to go through these settings one-by-one and adjust to your needs, however the default settings should be good for most use cases.
In the Performance Options tab we can set various settings related to the scans impact on server resources. I usually leave these as is and for most sites you are probably fine to do the same, however you may need to reduce these limits if you are running on a very small server setup.

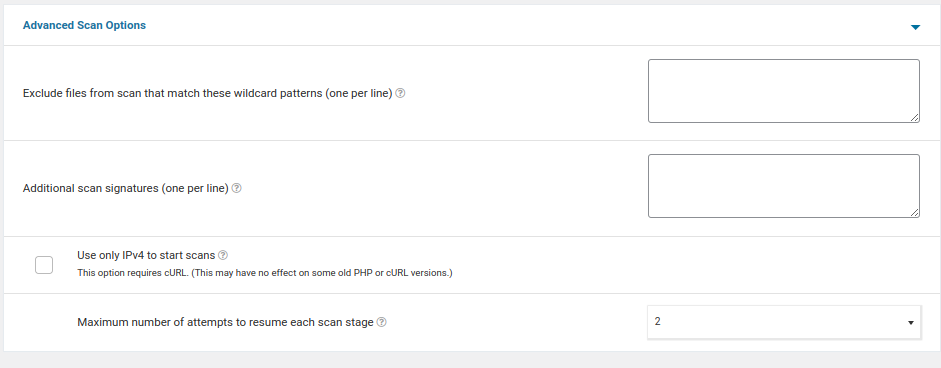
If you have specific files to exclude from the scan you can include these in the Advanced Scan Options tab. You can also include custom malware signatures to scan against here along with how many times to attempt to resume each stage of the scan, and whether or not to only use IPv4 to start scans.
Now that you have run through all of the scan settings, feel free to run your first scan. It will take a little while depending on your sites size, on average I would give it 15 mins to half an hour to run through everything, after the scan runs, you can look over the results, expect to see a notice about paths skipped due to scan settings, this is a default setting in WordFence that skips certain file paths due to known looping of certain file types that will make the scan continue endlessly, (I have seen this in my experience and I recommend leaving the scanner set to the default settings, unless you think you may have been hacked etc.). Review the scan results and correct anything that needs to be corrected.
Ok that’s way too broad, if any files show up as containing malware or suspicious you can manually review the file. See my article here on manually reviewing WordPress files 101. (LINK COMING SOON).
WordFence Live Traffic is an interesting and useful tool for viewing attacks and requests to your site, if you need to allowlist urls, ips, etc. the Live Traffic tool is going to be your best friend. The Live Traffic tool has two logging modes: security, and all. The security mode records all security related traffic and all records all traffic, although I’ve never tried using the “All” mode as a complete log replacement of WP Activity Log, it does record more traffic then you will want to filter through for analyzing security related traffic, I often leave it set to “security only” mode, unless I am really wanting to analyze traffic.
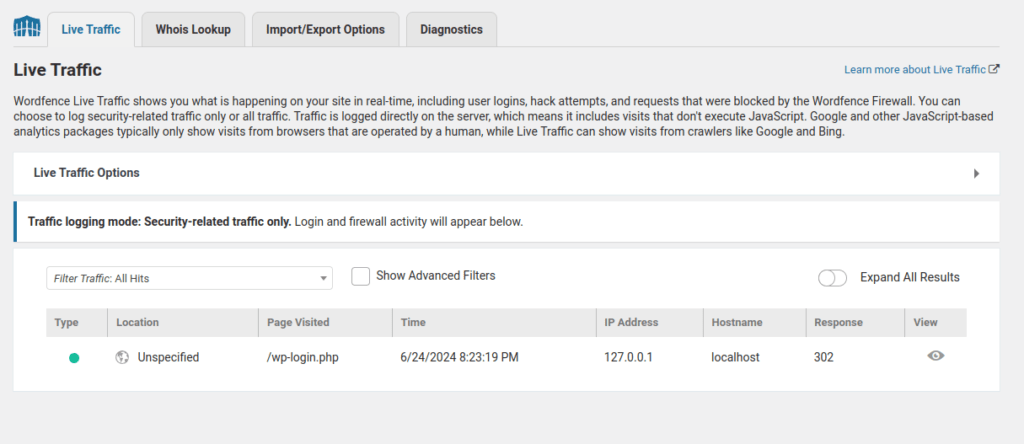
You can see the request type (bot, human, allowed, blocked, warning), location of the visitor, the page visited, time the request took place, visitor’s IP, hostname, and server response. You can view details regarding specific requests by clicking anywhere on the request. In the details you will see additional info such as Browser type etc. you will also see options to block / allow the IP that made the request, run a who-is lookup on the IP, view recent traffic from the IP, etc. Here you will also see an option to allowlist actions / urls if applicable.
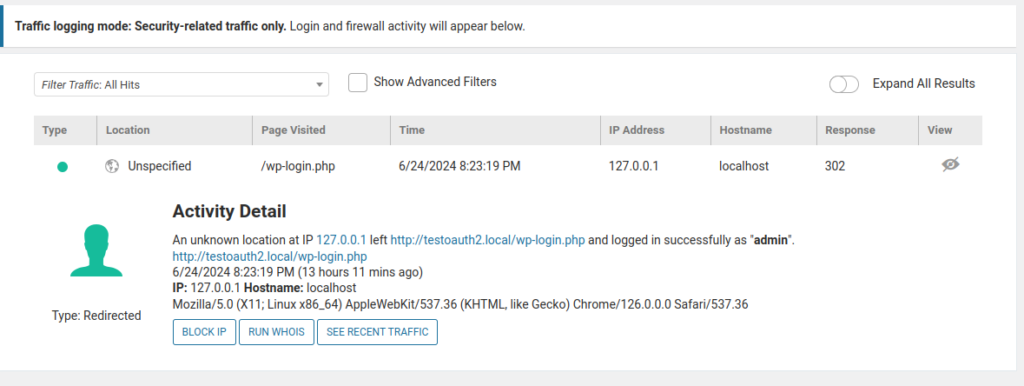
When you select “See Recent Traffic” and “Who-is” a slide-out panel will display recent traffic from that IP and additional info regarding the IP respectively.
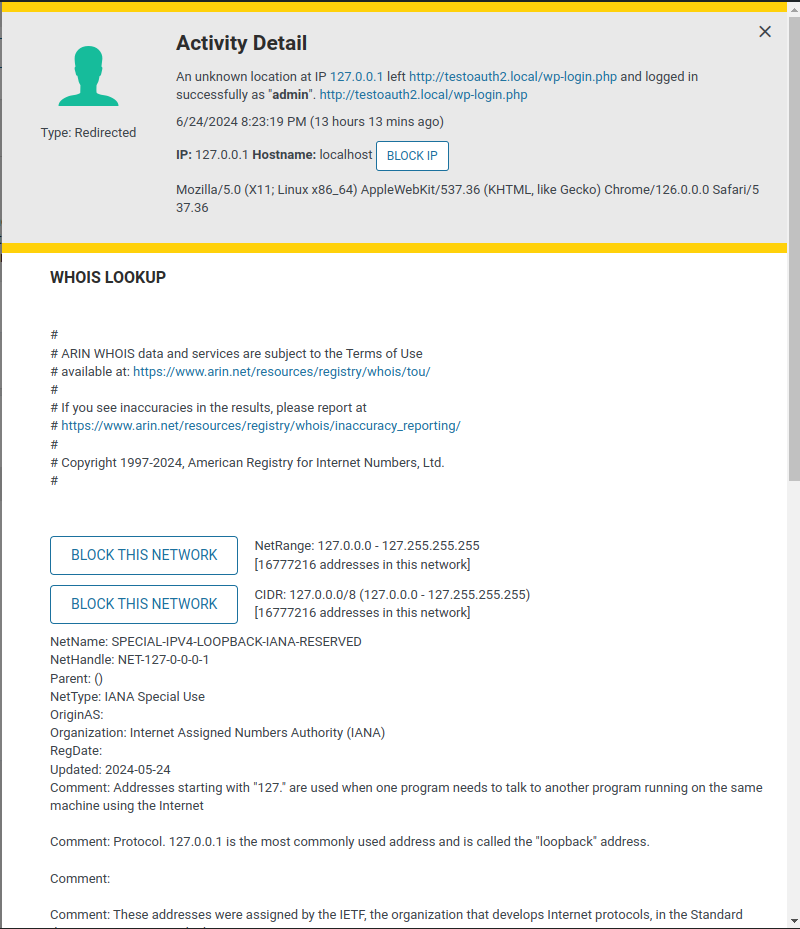
WordFence Who-is is a cool tool that looks up a visitor’s IP and displays additional info related to the IP such as hostname, contact info, etc.
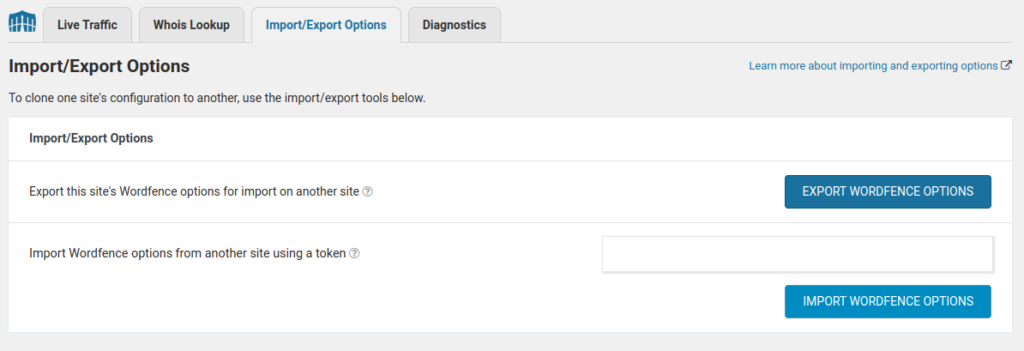
The WordFence Import/ Export dashboard allows you to import WordFence settings from another site to save you the time it would take to manually configure those WordFence settings again. The Export feature allows you to export your sites WordFence settings so you can import them into another site.
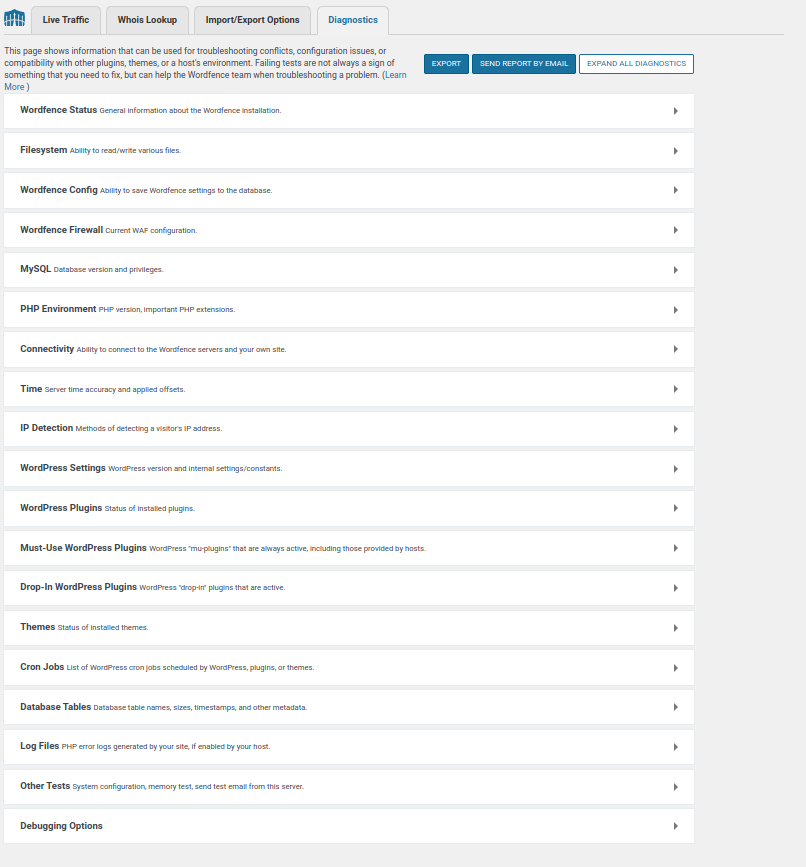
In the WordFence Diagnostics tab you can view tons of information related to your site from the WordFence version installed to the MySQL version of your WordPress database.
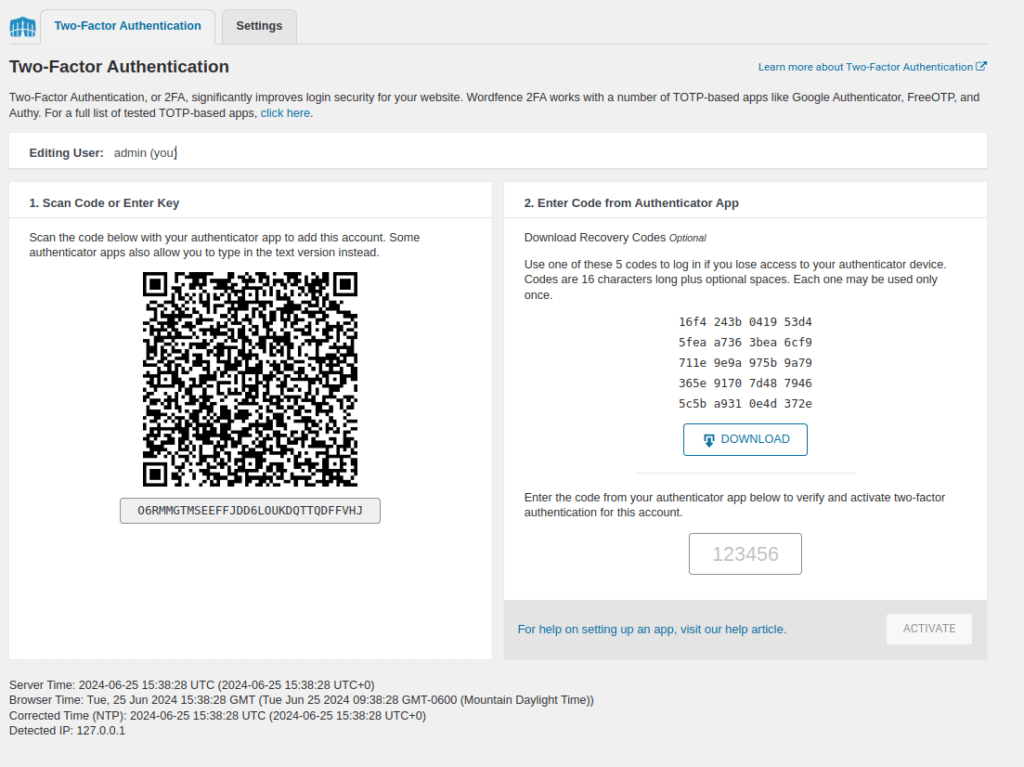
WordFence also includes the ability to require 2FA authentication of your site’s users. Go to the WordFence > Login Settings > 2FA page to enable 2FA. Here you can set 2FA policies such as by enforcing 2FA by user role (for instance admins or editors) and by user. You can also set how long a user has to activate 2FA and other settings such as whether or not you want to enable a frontend page for users to configure 2FA. Setting up 2FA for a user is extremely simple, the user just needs to navigate to their profile in the wp-admin area and click enable 2FA, it will walk them through scanning the QR code, generating recovery codes, etc.
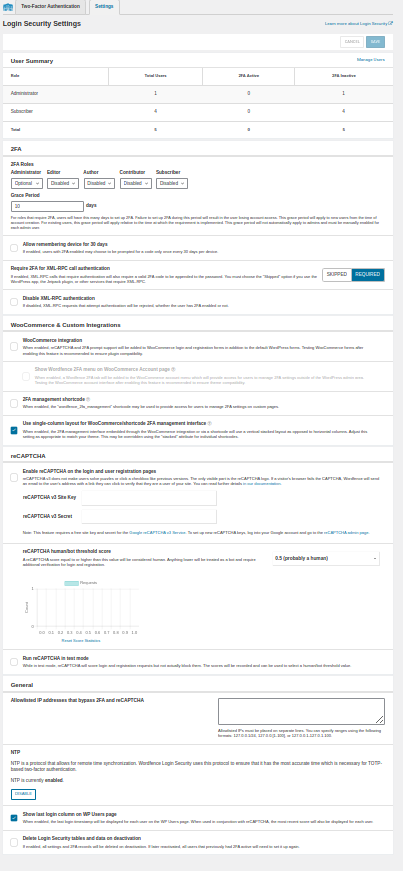
In the Settings page under >WordFence > Login > Settings you can manage numerous settings related to user and application authentication, settings include:
You can also view all WordFence settings all at once from the “All Options” tab.
This has been a lengthy tutorial, but I hope it proved extremely easy to follow and helped you optimize WordFence for your WordPress site’s security!
Walter Miely is a tech entrepreneur and CEO of Phoenix Ignited Tech You can find him on Linkedin. This material is licensed under the CC BY 4.0 License LEGAL DISCLAIMER: The content provided here is provided AS IS, and part of, or the entirety of this content may be incorrect. Please read the entireLegal Disclaimer here.
+ Ave Maria +